
단순히 s esc 키를 누르는 거 말고
좀 더 pyautogui를 이용해서 제대로 구현해 보았다
함수도 만들어서 돌아가게 만들어 봄
다이렉트x(DirectX) 로 만들어진 게임들은 pyautogui 가 제대로 작동하지 않는다. 그래서 pydirectinput 를 이용하면 키보드 마우스 컨트롤이 가능해진다.
만들면서.. 그림을 캡쳐해서 사용하다 보니.. 모니터 해상도에 따른 그림 인식을 못하는 이슈가 있었다
그래서.. QHD와 FHD 두 개 따로 캡처 서해 만듦... 역시 막일이군... ㅋㅋ
시작 전에 opencv-python 도 설치해 주셔야 정상작동하네요
그리고 파이썬 프로그램(VScode 등) 실행 시 관리자 권한으로 실행해야 클릭 등이 실행됩니다.
안되신다고 하시는 분들이 많으시네요.
cmd 창에서 python 라이 버리를 깔아준다.
pip install opencv-python
pip install pyautogui
pip install keyboard
pip install pydirectinput
pip install pillow
# 제작 : killsonic@naver.com
# 해상도 1920*1080 FHD / 2560*1440 QHD 창모드 최대화 (그림크기가 달라져 인식안됨)
import pyautogui as pgi
import time
import keyboard
import pydirectinput as pyd
import random
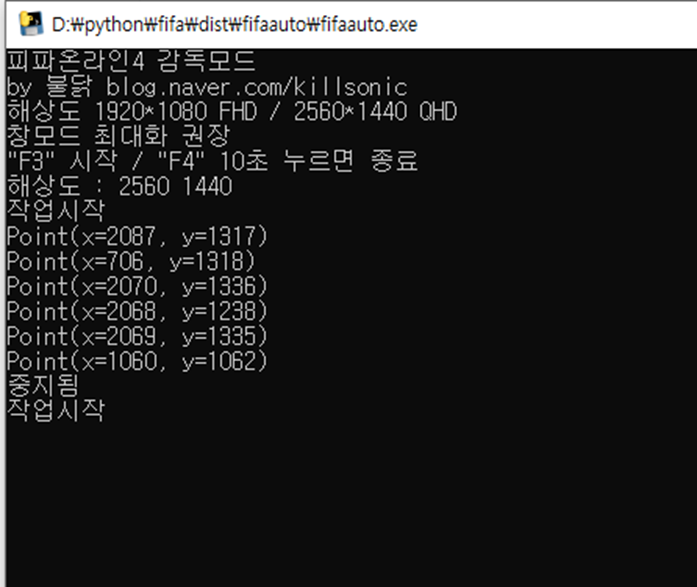
print('피파온라인4 감독모드')
print('by 불닭 blog.naver.com/killsonic')
print('해상도 1920*1080 FHD / 2560*1440 QHD')
print('창모드 최대화 권장')
print('"F3" 시작 / "F4" 10초 누르면 종료')
width, height = pgi.size() #화면해상도 확인
print('해상도 :' , width, height)
def skey():
pyd.keyDown("s")
time.sleep(0.05)
pyd.keyUp("s")
def imgclick(files): #이미지 찾아서 클릭 함수
imgfile = pgi.locateCenterOnScreen(files, confidence = 0.8)
if imgfile == None:
pass
else:
print(imgfile)
x, y = imgfile
x = x - random.randint(1, 20) + random.randint(1, 20)
y = y - random.randint(1, 20) + random.randint(1, 20)
pgi.click(x, y)
def skeypress(files): #이미지 찾아서 S 누름
imgfile = pgi.locateCenterOnScreen(files, confidence = 0.8)
if imgfile == None:
pass
else:
print(imgfile)
x, y = imgfile
x = x - random.randint(1, 20) + random.randint(1, 20)
y = y - random.randint(1, 20) + random.randint(1, 20)
pgi.click(x, y)
pyd.keyDown("s")
time.sleep(0.05)
pyd.keyUp("s")
def esckeypress(files): #이미지 찾아서 ESC 누름
imgfile = pgi.locateCenterOnScreen(files, confidence = 0.8)
if imgfile == None:
pass
else:
print(imgfile)
x, y = imgfile
x = x - random.randint(1, 20) + random.randint(1, 20)
y = y - random.randint(1, 20) + random.randint(1, 20)
pgi.click(x, y)
pyd.keyDown("esc")
time.sleep(0.05)
pyd.keyUp("esc")
while True:
if keyboard.is_pressed('F3'): #작업시작
print('작업시작')
while True:
if keyboard.is_pressed('F4'): #F4 중지
print('중지됨')
break
else:
if width == 2560: #해상도가 QHD 일 때 실행
skeypress('ss.png') #s 누르기
imgclick('s2.png') #확인
imgclick('s3.png') #공식경기
imgclick('s4.png') #진행
imgclick('s5.png') #선택완료
imgclick('s6.png') #다음
imgclick('s7.png') #확인
esckeypress('sesc.png') #esc 누르기
skeypress('sskip.png') #s 누르기
else: #해상도가 FHD 일 때 실행
skeypress('fhds.png') #s 누르기
imgclick('fhd2.png') #확인
imgclick('fhd3.png') #공식경기
imgclick('fhd4.png') #진행
imgclick('fhd5.png') #선택완료
imgclick('fhd6.png') #다음
imgclick('fhd7.png') #다음
esckeypress('fhdesc.png') #esc 누르기
skeypress('fhdskip.png') #s 누르기

그림파일 다운 ↓↓
fifa그림.zip
0.04MB
FHD와 QHD 두 해상도에서 작동하고
창모드 최대화를 해야 이미지 인식이 된다
여러 번 수정하고.. 머.. 잘 돌아가는 거 같다..
초보자도 조금만 공부하면 따라 하기 쉽다..
나도 프로그래밍 개발을 하다니!! 으어...
파이썬 좋다~
반응형
'IT와 코딩' 카테고리의 다른 글
| JavaScript 통합 요약본 (1) | 2022.09.19 |
|---|---|
| AWS 유분투에 그누보드 올려보기 (0) | 2022.09.18 |
| python 3.9 버전 cuda 설치하여 pytorch 연동하기 (0) | 2022.09.09 |
| 이번에 IPTIME 무선 공유기 교체를 해 보았다 AX2004M white (0) | 2022.09.08 |
| CSS 요약 정리 2 (2) | 2022.09.08 |


댓글